Chocolate Desserts
I love chocolate. It's one of my favorite desserts, whether in cake form, brownies, chocolate bars...the list goes on.
Here are six yummy chocolate desserts to help you through the day, including Chocolate Mousse and Fanntasy Fudge. Enjoy!
WORLD'S BEST CHOCOLATE PIE
This is from Diana Rattray at The Spruce Eats. She wrote, "This pie is made extra tasty with baker's chocolate and homemade whipped cream topping."
Prep Time: 20 minutes; Cook Time: 14 minutes; Total Time: 34 minutes; Makes 8 servings
To view this online, go to https://www.thespruceeats.com/worlds-best-chocolate-pie-3053489.
Ingredients
Pie:
1 (9-inch) prepared graham cracker pie shell
1 cup of sugar
2 tablespoons cornstarch
2 tablespoons flour (all-purpose)
1/4 teaspoon salt
3 cups of milk
3 egg yolks (slightly beaten)
4 (1-ounce) squares Baker’s unsweetened chocolate
2 tablespoons butter (unsalted)
2 teaspoons vanilla
Topping:
2 cups heavy whipping cream
1/2 cup sugar
1/2 teaspoon Hershey’s cocoa
Directions
Blend the sugar, cornstarch, flour, salt, and 1 cup of milk together with a wire whisk.
Whisk in the remaining 2 cups of milk.
Cook over medium heat for 8 to 9 minutes, until the mixture thickens, stirring constantly.
Remove from heat and whisk in the egg yolks.
Return to medium heat and cook, stirring constantly for 2 to 3 minutes more.
Remove from heat and stir in the chocolate squares, butter, and the vanilla. Stir until smooth and all the chocolate is melted.
Cool for 5 to 10 minutes, stirring occasionally. Pour into graham cracker pie and shell refrigerate for 4 hours.
For the topping, beat the whipping cream until soft peaks form.
Add the sugar slowly and beat until stiff peaks form.
Spread onto the cooled pie.
Sprinkle with 1/2 teaspoon of Hershey’s cocoa and serve.
CHOCOLATE MOUSSE
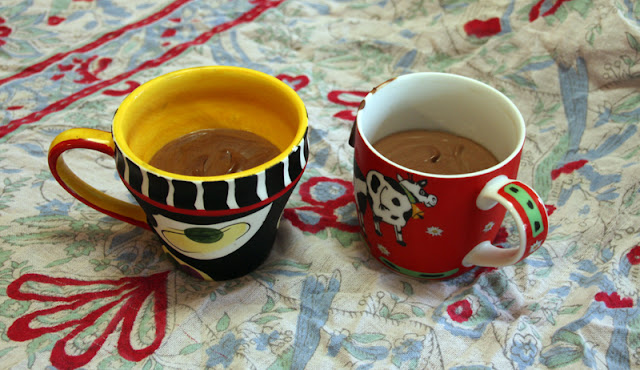
I saw something similar to this a few years back and tweaked it a little. For anyone who is sure that he or she won't like tofu, this may be the game-changer.

Ingredients
1 10-12 ounce tub of silken tofu
12 ounce bag of chocolate chips
2 - 3 tablespoons milk (you can use soy milk, if you prefer)
1 tsp vanilla
1 tablespoon maple syrup
Directions
Melt chocolate chips along with the milk over low to medium heat, stirring constantly.
Place silken tofu, melted chocolate chips, vanilla, and syrup into blender. Blend on a medium setting, pulsing if needed to combine.
Pour into 4 bowls or small cups, and let cool for 10 minutes or so.
Dig in! Yum!
FANTASY FUDGE
This recipe, from My Food and Family, begins, "Delight your taste buds with this amazing Fantasy Fudge. This Fantasy Fudge is a classic marshmallow fudge that gets its chocolatey, nutty goodness from BAKER'S Semi-Sweet Chocolate and walnuts."
Prep Time: 25 minutes; Total Time: 25 minutes
To view this online, go to https://www.myfoodandfamily.com/recipe/051833/fantasy-fudge.
Ingredients
3 cups sugar
3/4 cup butter or margarine
1 small can (5 oz.) evaporated milk (about 2/3 cup) (Do not use sweetened condensed milk.)
3 pkg. (4 oz. each) BAKER'S Semi-Sweet Chocolate, chopped
1 jar (7 oz.) JET-PUFFED Marshmallow Creme
1 cup chopped walnuts
1 tsp. vanilla
Directions
Line 9-inch square pan with Reynolds Wrap® Aluminum Foil, with ends of foil extending over sides. Bring sugar, butter and evaporated milk to full rolling boil in 3-qt. saucepan on medium heat, stirring constantly. Cook 4 min. or until candy thermometer reaches 234°F, stirring constantly. Remove from heat.
Add chocolate and marshmallow creme; stir until melted. Add nuts and vanilla; mix well.
Pour into prepared pan; spread to cover bottom of pan. Cool completely. Use foil handles to lift fudge from pan before cutting into 1-inch squares.
Kitchen Tips
Tip 1
Size Wise
A serving of this sweet treat is 2 squares. You'll find that a small portion goes a long way on chocolate flavor.
BUCKEYE ROLL-UPS
This is from Old El Paso, and begins, "You can make these addictive peanut butter and chocolate roll-ups a full day ahead for maximum convenience — but will you be able to resist the sweet and salty deliciousness for 24 whole hours?"
Prep Time: 20 minutes; Total Time: 2 hours 20 minutes; Makes 32 servings
To view this online, go to https://www.oldelpaso.com/recipes/buckeye-roll-ups.
Ingredients
1 container (8 oz) whipped cream cheese
2 tablespoons powdered sugar
1 cup creamy peanut butter
1 package (11 oz) Old El Paso™ flour tortillas for burritos (8 tortillas; 8 inch)
1 cup mini semisweet chocolate chips
1/2 cup chopped salted roasted peanuts
1 tablespoon unsweetened baking cocoa
Preparation
In small bowl, mix cream cheese and powdered sugar. Divide peanut butter among tortillas, spreading evenly over tortillas, leaving 1/2-inch border. Divide cream cheese mixture evenly among tortillas, gently spreading over peanut butter. Top half of each tortilla with chocolate chips and peanuts.
Starting from side with toppings, roll up very tightly. Wrap with plastic wrap. Refrigerate at least 2 hours but no longer than 24 hours.
To serve, cut 1 inch from end of each roll, and discard. Cut each roll into 4 (1 1/2-inch) slices. Sprinkle with cocoa.
Expert Tips
The whipped cream cheese is a cinch to combine with the powdered sugar, and it spreads easily straight from the refrigerator.
For best results, use a small offset spatula for spreading the peanut butter and cream cheese mixture.
CHOCOLATE RASPBERRY LAYER CAKE
This yumminest comes from Diana Rattray on The Spruce Eats. For this recipe, she wrote, " This chocolate raspberry layer cake will be an instant hit whether you bake it for friends, family, or that special someone. The cake might look challenging at first glance, but it is pretty straightforward. Even though there are several steps to this recipe, the cake, filling, and frosting can all be prepared a day or two in advance. All you have to do on the serving day is assemble the layers, frost the cake, and add some fresh raspberries to the top.
"Raspberries pair well with chocolate, making the raspberry filling the perfect combo for a stunning holiday-worthy dessert. You can always swap the homemade filling out with raspberry jam or cake filling if you're short on time.
"The dark chocolate cake is moist and decadent, and the 3 layers make a beautiful and dramatic statement with the bright red raspberries and chocolate buttercream frosting."
Prep Time: 90 minutes; Cook Time: 40 minutes; Total Time: 2 hours 10 minutes; Servings: 12 servings; Yield: 1 cake
To view this online, go to https://www.thespruceeats.com/chocolate-raspberry-layer-cake-recipe-5208221.
Ingredients
For the Raspberry Filling:
1 cup sugar
3 tablespoons cornstarch
1 tablespoon lemon juice
1 tablespoon water
4 cups frozen raspberries, or fresh
For the Cake:
2 cups all-purpose flour
2 cups sugar
2/3 cup unsweetened natural cocoa powder
1-1/2 teaspoons baking soda
1-1/2 teaspoons baking powder
1 teaspoon salt
2 large eggs
1 cup buttermilk, well shaken
1/2 cup canola or vegetable oil
2 teaspoons vanilla extract
1 cup very hot water, or hot freshly brewed coffee
For the Chocolate Buttercream:
1-1/4 cups (12 tablespoons) unsalted butter, at room temperature
4 cups confectioners' sugar
3/4 cup unsweetened natural cocoa powder
4 to 6 tablespoons heavy cream, or half-and-half or milk, as needed
1-1/2 teaspoons vanilla extract
1/4 teaspoon salt
6 ounces fresh raspberries, optional, for garnish
Directions
Prepare the Raspberry Filling
Gather the raspberry filling ingredients.
Combine the sugar and cornstarch in a medium saucepan. Whisk to combine and then add the lemon juice, water, and frozen (or fresh) raspberries.
Place the saucepan over medium heat and bring to a boil. Reduce the heat to a simmer and cook until thickened, about 8 to 10 minutes, stirring frequently.
Let the raspberry filling cool and refrigerate until it's time to assemble the cake.
Make the Chocolate Cake
Gather the cake ingredients.
Position an oven rack in the center of the oven and preheat to 350 F. Grease three 8-inch round cake pans and then line them with parchment paper. Set aside.
Sift the flour, sugar, cocoa powder, baking soda, baking powder, and salt into a large mixing bowl. Stir to blend thoroughly.
In a separate bowl, whisk the eggs, buttermilk, oil, and vanilla extract together.
Add the wet ingredients to the dry mixture and mix until combined.
Add the hot water (or hot coffee) to the mixing bowl and mix just until the batter is combined. The batter will be thin.
Divide the batter evenly among the baking pans. If you are weighing ingredients, it will be roughly 15 to 16 ounces per pan for a 3-layer cake or about 22 to 24 ounces per pan for a 2-layer cake.
Bake the cakes for 24 to 27 minutes, or until a toothpick inserted into the center of the cakes comes out clean.
Cool the cake layers in the pan on a cooling rack for 20 minutes.
Then, turn the layers out onto the cooling racks to cool completely.
Prepare the Chocolate Buttercream
Gather the ingredients for the chocolate buttercream.
In a mixing bowl with an electric mixer at medium-high speed, beat the butter for 2 minutes or until creamy.
Sift the confectioners' sugar and cocoa powder together in a separate bowl.
Slowly add the dry ingredients to the butter along with 4 tablespoons cream, vanilla extract, and salt. Mix on low speed until combined. Increase the speed to high and beat for about 1 minute, adding more cream if needed, until you reach the desired spreading consistency. If the buttercream gets too soft, refrigerate it for 15 to 20 minutes to firm up before frosting the cake.
Assemble the Cake
Place a cake layer on a cake plate or cake stand and spread with about a cup of raspberry filling.
Place the second layer on top and spread with more raspberry filling. Add the 3rd layer.
Frost the top and sides of the cake with the chocolate buttercream frosting. If you have leftover filling, refrigerate it in a covered container or jar for other uses.
If desired, arrange fresh raspberries over the top of the frosted cake or add a decorative piped edging with any leftover buttercream and refrigerate until it's time to serve.
Make-Ahead Tips
You may make the raspberry filling a day or two in advance. Cover and refrigerate until about an hour or two before you plan to assemble the layers. Make sure the filling is completely cooled and thick before assembling the cake so that the cake layers sit securely when filled and stacked.
You may make the cake layers a day in advance. Wrap each layer—slightly warm or thoroughly cooled—in plastic wrap and stack them, placing cardboard cake rounds between the layers.
You may make the buttercream frosting a day or two in advance. Cover the frosting and refrigerate until about 2 hours before you plan to assemble the cake. Re-beat it for a minute or two with an electric mixer until smooth and creamy.
Recipe Variations
Replace the raspberry filling with about 1 to 1-1/2 cups of raspberry cake filling or jam.
To Make Seedless Raspberry Filling:
Simmer the raspberries, sugar, and lemon juice together until the raspberries break down into a sauce. Use a food mill to remove the seeds or press them through a sieve. Add the seedless juice back to the saucepan and bring it back to a simmer. In a small bowl, combine the cornstarch with 2 tablespoons of water to form a paste. Add this to the raspberry sauce and continue cooking until thickened.
Add even more drama to the chocolate raspberry cake with a ganache drip around the edge.
If you don't have buttermilk, it's easy to make a substitute. For 1 cup of buttermilk, add 1 tablespoon of vinegar or lemon juice to a fluid measuring cup. Add milk to the 1 cup level and let stand for about 10 minutes.
How to Store
Store the cake, covered, in the refrigerator—it will last for up to 1 week. Serve the cake at room temperature; remove it from the fridge about 1 to 2 hours before serving.
To freeze leftover cake slices, arrange them on a baking sheet and freeze until solid. Wrap the portions tightly in plastic wrap and place them in a resealable freezer bag.
FLOURLESS CHOCOLATE CAKE
This is from Genevieve Ko in The New York Times cooking e-newsletter. Genevieve wrote, "Crackly on top and fudgy yet tender in the center, this cake tastes like a complex restaurant dessert, but comes together effortlessly in one bowl. Chocolate chips save you the messy step of chopping chocolate bars and deliver deep flavor along with cocoa powder. If you don’t have a springform pan, a regular cake pan lined with foil all around makes it easy to lift out the delicate cake, which melts in your mouth when served warm or at room temperature. Refrigerated or frozen leftovers take on a candylike chewiness, but a quick zap in the microwave will return it to just-baked softness. Slices are delicious on their own or with any creamy toppings."
Yield: 8 to 12 servings; Time: 1 hour 15 minutes
This was featured in "Forget Chocolate Bars: Baking With Chips Is Often Better", and can be viewed online at https://cooking.nytimes.com/recipes/1022963-flourless-chocolate-cake.
Ingredients
3/4 cup unsalted butter, cut up, plus more for greasing the pan
1 cup bittersweet or semisweet chocolate chips
1/2 cup unsweetened natural cocoa powder
3/4 cup granulated sugar
4 large eggs
1 teaspoon pure vanilla extract
Whipped cream or ice cream, for serving (optional)
Preparation
Heat oven to 350 degrees. Generously butter the bottom and sides of an 8-inch springform pan, or press a large sheet of foil into the bottom and up the sides of an 8-inch round cake pan, smoothing the sides, and generously butter the foil.
\Bring a few inches of water in a large saucepan to a simmer over medium heat. Set a large heatproof bowl over the saucepan and add the chocolate. When the chips look soft and melty, stir gently until smooth. Turn off the heat, and add the butter to the bowl. Stir gently until melted and smooth. Add the cocoa powder and stir until smooth, then take the bowl off the saucepan.
Stir in the granulated sugar until incorporated, then add the eggs, one at a time, and beat well after each addition. Stir in the vanilla, then scrape the batter into the prepared pan and smooth the top.
Bake until crackly and dry on top, and a toothpick inserted 2 inches from the edge comes out clean, 40 to 50 minutes. A toothpick inserted in the center should come out with some crumbs attached.
Cool in the pan on a rack, then remove the sides of the springform pan or lift the cake out of the cake pan using the foil overhang. You can slice and serve warm or at room temperature. Or, to cut very neat slices, freeze the cooled cake until firm. Slice and warm up in the microwave or oven, if preferred. Serve the cake with whipped cream or ice cream, if you’d like. The cake can be wrapped and kept at room temperature for up to 3 days, in the refrigerator for up to 1 week or in the freezer for up to 1 month.
Here are six yummy chocolate desserts to help you through the day, including Chocolate Mousse and Fanntasy Fudge. Enjoy!
WORLD'S BEST CHOCOLATE PIE
This is from Diana Rattray at The Spruce Eats. She wrote, "This pie is made extra tasty with baker's chocolate and homemade whipped cream topping."
Prep Time: 20 minutes; Cook Time: 14 minutes; Total Time: 34 minutes; Makes 8 servings
To view this online, go to https://www.thespruceeats.com/worlds-best-chocolate-pie-3053489.
Ingredients
Pie:
1 (9-inch) prepared graham cracker pie shell
1 cup of sugar
2 tablespoons cornstarch
2 tablespoons flour (all-purpose)
1/4 teaspoon salt
3 cups of milk
3 egg yolks (slightly beaten)
4 (1-ounce) squares Baker’s unsweetened chocolate
2 tablespoons butter (unsalted)
2 teaspoons vanilla
Topping:
2 cups heavy whipping cream
1/2 cup sugar
1/2 teaspoon Hershey’s cocoa
Directions
Blend the sugar, cornstarch, flour, salt, and 1 cup of milk together with a wire whisk.
Whisk in the remaining 2 cups of milk.
Cook over medium heat for 8 to 9 minutes, until the mixture thickens, stirring constantly.
Remove from heat and whisk in the egg yolks.
Return to medium heat and cook, stirring constantly for 2 to 3 minutes more.
Remove from heat and stir in the chocolate squares, butter, and the vanilla. Stir until smooth and all the chocolate is melted.
Cool for 5 to 10 minutes, stirring occasionally. Pour into graham cracker pie and shell refrigerate for 4 hours.
For the topping, beat the whipping cream until soft peaks form.
Add the sugar slowly and beat until stiff peaks form.
Spread onto the cooled pie.
Sprinkle with 1/2 teaspoon of Hershey’s cocoa and serve.
CHOCOLATE MOUSSE

I saw something similar to this a few years back and tweaked it a little. For anyone who is sure that he or she won't like tofu, this may be the game-changer.

Ingredients
1 10-12 ounce tub of silken tofu
12 ounce bag of chocolate chips
2 - 3 tablespoons milk (you can use soy milk, if you prefer)
1 tsp vanilla
1 tablespoon maple syrup
Directions
Melt chocolate chips along with the milk over low to medium heat, stirring constantly.
Place silken tofu, melted chocolate chips, vanilla, and syrup into blender. Blend on a medium setting, pulsing if needed to combine.
Pour into 4 bowls or small cups, and let cool for 10 minutes or so.
Dig in! Yum!
FANTASY FUDGE
This recipe, from My Food and Family, begins, "Delight your taste buds with this amazing Fantasy Fudge. This Fantasy Fudge is a classic marshmallow fudge that gets its chocolatey, nutty goodness from BAKER'S Semi-Sweet Chocolate and walnuts."
Prep Time: 25 minutes; Total Time: 25 minutes
To view this online, go to https://www.myfoodandfamily.com/recipe/051833/fantasy-fudge.
Ingredients
3 cups sugar
3/4 cup butter or margarine
1 small can (5 oz.) evaporated milk (about 2/3 cup) (Do not use sweetened condensed milk.)
3 pkg. (4 oz. each) BAKER'S Semi-Sweet Chocolate, chopped
1 jar (7 oz.) JET-PUFFED Marshmallow Creme
1 cup chopped walnuts
1 tsp. vanilla
Directions
Line 9-inch square pan with Reynolds Wrap® Aluminum Foil, with ends of foil extending over sides. Bring sugar, butter and evaporated milk to full rolling boil in 3-qt. saucepan on medium heat, stirring constantly. Cook 4 min. or until candy thermometer reaches 234°F, stirring constantly. Remove from heat.
Add chocolate and marshmallow creme; stir until melted. Add nuts and vanilla; mix well.
Pour into prepared pan; spread to cover bottom of pan. Cool completely. Use foil handles to lift fudge from pan before cutting into 1-inch squares.
Kitchen Tips
Tip 1
Size Wise
A serving of this sweet treat is 2 squares. You'll find that a small portion goes a long way on chocolate flavor.
BUCKEYE ROLL-UPS
This is from Old El Paso, and begins, "You can make these addictive peanut butter and chocolate roll-ups a full day ahead for maximum convenience — but will you be able to resist the sweet and salty deliciousness for 24 whole hours?"
Prep Time: 20 minutes; Total Time: 2 hours 20 minutes; Makes 32 servings
To view this online, go to https://www.oldelpaso.com/recipes/buckeye-roll-ups.
Ingredients
1 container (8 oz) whipped cream cheese
2 tablespoons powdered sugar
1 cup creamy peanut butter
1 package (11 oz) Old El Paso™ flour tortillas for burritos (8 tortillas; 8 inch)
1 cup mini semisweet chocolate chips
1/2 cup chopped salted roasted peanuts
1 tablespoon unsweetened baking cocoa
Preparation
In small bowl, mix cream cheese and powdered sugar. Divide peanut butter among tortillas, spreading evenly over tortillas, leaving 1/2-inch border. Divide cream cheese mixture evenly among tortillas, gently spreading over peanut butter. Top half of each tortilla with chocolate chips and peanuts.
Starting from side with toppings, roll up very tightly. Wrap with plastic wrap. Refrigerate at least 2 hours but no longer than 24 hours.
To serve, cut 1 inch from end of each roll, and discard. Cut each roll into 4 (1 1/2-inch) slices. Sprinkle with cocoa.
Expert Tips
The whipped cream cheese is a cinch to combine with the powdered sugar, and it spreads easily straight from the refrigerator.
For best results, use a small offset spatula for spreading the peanut butter and cream cheese mixture.
CHOCOLATE RASPBERRY LAYER CAKE
This yumminest comes from Diana Rattray on The Spruce Eats. For this recipe, she wrote, " This chocolate raspberry layer cake will be an instant hit whether you bake it for friends, family, or that special someone. The cake might look challenging at first glance, but it is pretty straightforward. Even though there are several steps to this recipe, the cake, filling, and frosting can all be prepared a day or two in advance. All you have to do on the serving day is assemble the layers, frost the cake, and add some fresh raspberries to the top.
"Raspberries pair well with chocolate, making the raspberry filling the perfect combo for a stunning holiday-worthy dessert. You can always swap the homemade filling out with raspberry jam or cake filling if you're short on time.
"The dark chocolate cake is moist and decadent, and the 3 layers make a beautiful and dramatic statement with the bright red raspberries and chocolate buttercream frosting."
Prep Time: 90 minutes; Cook Time: 40 minutes; Total Time: 2 hours 10 minutes; Servings: 12 servings; Yield: 1 cake
To view this online, go to https://www.thespruceeats.com/chocolate-raspberry-layer-cake-recipe-5208221.
Ingredients
For the Raspberry Filling:
1 cup sugar
3 tablespoons cornstarch
1 tablespoon lemon juice
1 tablespoon water
4 cups frozen raspberries, or fresh
For the Cake:
2 cups all-purpose flour
2 cups sugar
2/3 cup unsweetened natural cocoa powder
1-1/2 teaspoons baking soda
1-1/2 teaspoons baking powder
1 teaspoon salt
2 large eggs
1 cup buttermilk, well shaken
1/2 cup canola or vegetable oil
2 teaspoons vanilla extract
1 cup very hot water, or hot freshly brewed coffee
For the Chocolate Buttercream:
1-1/4 cups (12 tablespoons) unsalted butter, at room temperature
4 cups confectioners' sugar
3/4 cup unsweetened natural cocoa powder
4 to 6 tablespoons heavy cream, or half-and-half or milk, as needed
1-1/2 teaspoons vanilla extract
1/4 teaspoon salt
6 ounces fresh raspberries, optional, for garnish
Directions
Prepare the Raspberry Filling
Gather the raspberry filling ingredients.
Combine the sugar and cornstarch in a medium saucepan. Whisk to combine and then add the lemon juice, water, and frozen (or fresh) raspberries.
Place the saucepan over medium heat and bring to a boil. Reduce the heat to a simmer and cook until thickened, about 8 to 10 minutes, stirring frequently.
Let the raspberry filling cool and refrigerate until it's time to assemble the cake.
Make the Chocolate Cake
Gather the cake ingredients.
Position an oven rack in the center of the oven and preheat to 350 F. Grease three 8-inch round cake pans and then line them with parchment paper. Set aside.
Sift the flour, sugar, cocoa powder, baking soda, baking powder, and salt into a large mixing bowl. Stir to blend thoroughly.
In a separate bowl, whisk the eggs, buttermilk, oil, and vanilla extract together.
Add the wet ingredients to the dry mixture and mix until combined.
Add the hot water (or hot coffee) to the mixing bowl and mix just until the batter is combined. The batter will be thin.
Divide the batter evenly among the baking pans. If you are weighing ingredients, it will be roughly 15 to 16 ounces per pan for a 3-layer cake or about 22 to 24 ounces per pan for a 2-layer cake.
Bake the cakes for 24 to 27 minutes, or until a toothpick inserted into the center of the cakes comes out clean.
Cool the cake layers in the pan on a cooling rack for 20 minutes.
Then, turn the layers out onto the cooling racks to cool completely.
Prepare the Chocolate Buttercream
Gather the ingredients for the chocolate buttercream.
In a mixing bowl with an electric mixer at medium-high speed, beat the butter for 2 minutes or until creamy.
Sift the confectioners' sugar and cocoa powder together in a separate bowl.
Slowly add the dry ingredients to the butter along with 4 tablespoons cream, vanilla extract, and salt. Mix on low speed until combined. Increase the speed to high and beat for about 1 minute, adding more cream if needed, until you reach the desired spreading consistency. If the buttercream gets too soft, refrigerate it for 15 to 20 minutes to firm up before frosting the cake.
Assemble the Cake
Place a cake layer on a cake plate or cake stand and spread with about a cup of raspberry filling.
Place the second layer on top and spread with more raspberry filling. Add the 3rd layer.
Frost the top and sides of the cake with the chocolate buttercream frosting. If you have leftover filling, refrigerate it in a covered container or jar for other uses.
If desired, arrange fresh raspberries over the top of the frosted cake or add a decorative piped edging with any leftover buttercream and refrigerate until it's time to serve.
Make-Ahead Tips
You may make the raspberry filling a day or two in advance. Cover and refrigerate until about an hour or two before you plan to assemble the layers. Make sure the filling is completely cooled and thick before assembling the cake so that the cake layers sit securely when filled and stacked.
You may make the cake layers a day in advance. Wrap each layer—slightly warm or thoroughly cooled—in plastic wrap and stack them, placing cardboard cake rounds between the layers.
You may make the buttercream frosting a day or two in advance. Cover the frosting and refrigerate until about 2 hours before you plan to assemble the cake. Re-beat it for a minute or two with an electric mixer until smooth and creamy.
Recipe Variations
Replace the raspberry filling with about 1 to 1-1/2 cups of raspberry cake filling or jam.
To Make Seedless Raspberry Filling:
Simmer the raspberries, sugar, and lemon juice together until the raspberries break down into a sauce. Use a food mill to remove the seeds or press them through a sieve. Add the seedless juice back to the saucepan and bring it back to a simmer. In a small bowl, combine the cornstarch with 2 tablespoons of water to form a paste. Add this to the raspberry sauce and continue cooking until thickened.
Add even more drama to the chocolate raspberry cake with a ganache drip around the edge.
If you don't have buttermilk, it's easy to make a substitute. For 1 cup of buttermilk, add 1 tablespoon of vinegar or lemon juice to a fluid measuring cup. Add milk to the 1 cup level and let stand for about 10 minutes.
How to Store
Store the cake, covered, in the refrigerator—it will last for up to 1 week. Serve the cake at room temperature; remove it from the fridge about 1 to 2 hours before serving.
To freeze leftover cake slices, arrange them on a baking sheet and freeze until solid. Wrap the portions tightly in plastic wrap and place them in a resealable freezer bag.
FLOURLESS CHOCOLATE CAKE
This is from Genevieve Ko in The New York Times cooking e-newsletter. Genevieve wrote, "Crackly on top and fudgy yet tender in the center, this cake tastes like a complex restaurant dessert, but comes together effortlessly in one bowl. Chocolate chips save you the messy step of chopping chocolate bars and deliver deep flavor along with cocoa powder. If you don’t have a springform pan, a regular cake pan lined with foil all around makes it easy to lift out the delicate cake, which melts in your mouth when served warm or at room temperature. Refrigerated or frozen leftovers take on a candylike chewiness, but a quick zap in the microwave will return it to just-baked softness. Slices are delicious on their own or with any creamy toppings."
Yield: 8 to 12 servings; Time: 1 hour 15 minutes
This was featured in "Forget Chocolate Bars: Baking With Chips Is Often Better", and can be viewed online at https://cooking.nytimes.com/recipes/1022963-flourless-chocolate-cake.
Ingredients
3/4 cup unsalted butter, cut up, plus more for greasing the pan
1 cup bittersweet or semisweet chocolate chips
1/2 cup unsweetened natural cocoa powder
3/4 cup granulated sugar
4 large eggs
1 teaspoon pure vanilla extract
Whipped cream or ice cream, for serving (optional)
Preparation
Heat oven to 350 degrees. Generously butter the bottom and sides of an 8-inch springform pan, or press a large sheet of foil into the bottom and up the sides of an 8-inch round cake pan, smoothing the sides, and generously butter the foil.
\Bring a few inches of water in a large saucepan to a simmer over medium heat. Set a large heatproof bowl over the saucepan and add the chocolate. When the chips look soft and melty, stir gently until smooth. Turn off the heat, and add the butter to the bowl. Stir gently until melted and smooth. Add the cocoa powder and stir until smooth, then take the bowl off the saucepan.
Stir in the granulated sugar until incorporated, then add the eggs, one at a time, and beat well after each addition. Stir in the vanilla, then scrape the batter into the prepared pan and smooth the top.
Bake until crackly and dry on top, and a toothpick inserted 2 inches from the edge comes out clean, 40 to 50 minutes. A toothpick inserted in the center should come out with some crumbs attached.
Cool in the pan on a rack, then remove the sides of the springform pan or lift the cake out of the cake pan using the foil overhang. You can slice and serve warm or at room temperature. Or, to cut very neat slices, freeze the cooled cake until firm. Slice and warm up in the microwave or oven, if preferred. Serve the cake with whipped cream or ice cream, if you’d like. The cake can be wrapped and kept at room temperature for up to 3 days, in the refrigerator for up to 1 week or in the freezer for up to 1 month.

Comments
Post a Comment